How To Use Font Awesome 6 with React

Frontend developer | Community Manager
Introduction
Font Awesome is an icon font like a regular font; you get an icon instead of letters. It's flexible in colouring, sizing and stacking on top of other background styles using plain CSS.
We can use Font Awesome with inline elements. Inline elements like <i> and <span> are used mainly with icons. Font Awesome has unique icon styles: solid, regular, light, thin, duotone, and brands.
React app can use Font Awesome, and in this article, we will use Font awesome 6 with React to create different icons. Font awesome has free and pro icons. The free icons are accessible without subscribing or paying for them, while the pro icons are accessible based on subscription or payment. If we plan to use the Pro packages, which contain more icons and styles, we'll need an active subscription to a Pro Plan and a valid Pro Package Token. We will be using the free icons in this article.
What we will be building
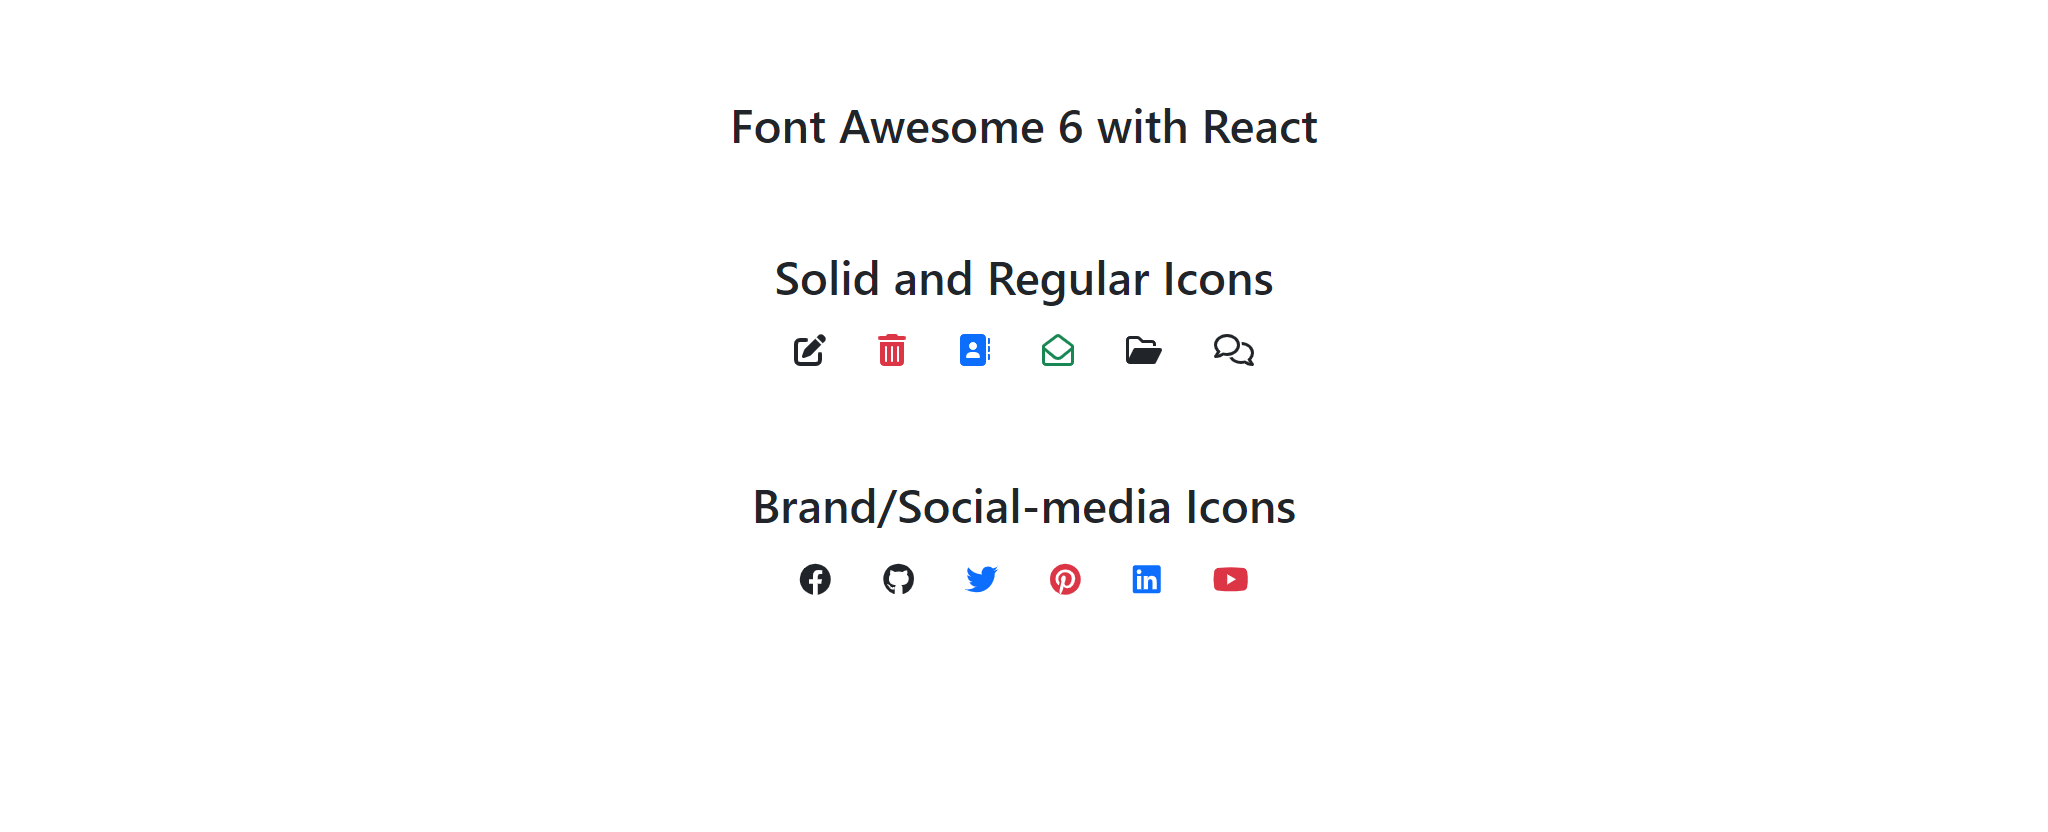
The video below shows the icons we'll create using font awesome in React.
Project Setup
To get started, we will create a react app project using npm or yarn and start the project with the commands below.
We will run the following commands to set up the project in the terminal of our local machine.
npm
npx create-react-app my-app
cd my-app
npm start
yarn
yarn create react-app my-app
cd my-app
yarn start
If we successfully set up our project, React will automatically launch the application on the browser using http://localhost:3000/
Using Font Awesome with React
We'll need to use npm or yarn to install the core package, which includes all the utilities to make the icons work:
First, we add SVG Core.
npm
npm i --save @fortawesome/fontawesome-svg-core
yarn
yarn add @fortawesome/fontawesome-svg-core
Next, we'll add Icon Packages.
We'll install the icons we want to use; we can choose Free or Pro icons and select any style.
npm
# Free icons styles
npm i --save @fortawesome/free-solid-svg-icons
npm i --save @fortawesome/free-regular-svg-icons
npm i --save @fortawesome/free-brands-svg-icons
yarn
# Free icons styles
yarn add @fortawesome/free-solid-svg-icons
yarn add @fortawesome/free-regular-svg-icons
yarn add @fortawesome/free-brands-svg-icons
Some icons are not available for free, and they're only accessible after paying for the plan. They are called Pro-icons.
We'll first need to set up access with secret Font Awesome npm token and global for Pro icons, which we can configure by following the link here.
Next, we'll install the pro-icons
npm
# Pro icons styles
npm i --save @fortawesome/pro-solid-svg-icons
npm i --save @fortawesome/pro-regular-svg-icons
npm i --save @fortawesome/pro-light-svg-icons
npm i --save @fortawesome/pro-thin-svg-icons
npm i --save @fortawesome/pro-duotone-svg-icons
yarn
# Pro icons styles
yarn add @fortawesome/pro-solid-svg-icons
yarn add @fortawesome/pro-regular-svg-icons
yarn add @fortawesome/pro-light-svg-icons
yarn add @fortawesome/pro-thin-svg-icons
yarn add @fortawesome/pro-duotone-svg-icons
But for this article, we'll use the free icons only.
lastly, we'll install the Font Awesome React component
npm
npm i --save @fortawesome/react-fontawesome@latest
yarn
yarn add @fortawesome/react-fontawesome@latest
After successful installation of packages, our package.json file will contain all the dependencies installed, and it will look like the image below.
// package.json file

{
 "dependencies": {
    "@fortawesome/fontawesome-svg-core": "^1.3.0",
    "@fortawesome/free-brands-svg-icons": "^6.0.0",
    "@fortawesome/free-regular-svg-icons": "^6.0.0",
    "@fortawesome/free-solid-svg-icons": "^6.0.0",
    "@fortawesome/react-fontawesome": "^0.1.17",
    "@testing-library/jest-dom": "^5.14.1",
    "@testing-library/react": "^12.0.0",
    "@testing-library/user-event": "^13.2.1",
    "bootstrap": "^5.1.3",
    "react": "^17.0.2",
    "react-bootstrap": "^2.1.1",
    "react-scripts": "5.0.0",
    "web-vitals": "^2.1.0"
  },
}
We're now ready to add icons.
Inside our src folder, we'll create a folder called components and add a file name Tutorial.js.
// Tutorial.js file

import React from "react";
import { FontAwesomeIcon } from "@fortawesome/react-fontawesome";
import { faAddressBook,faPenToSquare,faTrashCan } from "@fortawesome/free-solid-svg-icons";
import { faComments, faEnvelopeOpen, faFolderOpen} from "@fortawesome/free-regular-svg-icons";
import { faFacebook, faGithub,faLinkedin, faPinterest, faTwitter, faYoutube} from "@fortawesome/free-brands-svg-icons";

const Tutorial = () => {

  return (
    <div className="text-center mt-5">
      <h4>Font Awesome 6 with React</h4>
      <div className="mt-5">
        <h4>Solid and Regular Icons</h4>
        <FontAwesomeIcon icon={faPenToSquare} className="btn" />
        <FontAwesomeIcon icon={faTrashCan} className="btn text-danger" />
        <FontAwesomeIcon icon={faAddressBook} className="btn text-primary" />
        <FontAwesomeIcon icon={faEnvelopeOpen} className="btn text-success" />
        <FontAwesomeIcon icon={faFolderOpen} className="btn" />
        <FontAwesomeIcon icon={faComments} className="btn" />
      </div>
      <div className="mt-5">
        <h4>Brand/Social-media Icons</h4>
        <FontAwesomeIcon icon={faFacebook} className="btn" />
        <FontAwesomeIcon icon={faGithub} className="btn" />
        <FontAwesomeIcon icon={faTwitter} className="btn text-primary" />
        <FontAwesomeIcon icon={faPinterest} className="btn text-danger" />
        <FontAwesomeIcon icon={faLinkedin} className="btn text-primary" />
        <FontAwesomeIcon icon={faYoutube} className="btn text-danger" />
      </div>
    </div>
  );
};
export default Tutorial;
In the Tutorial.js file, we imported the FontAwesomeIcon, and the particular icon we wanted to use. We called the FontAwesome component in the render section with the specific icon property.
In other to display the icons on the browser, we imported our Tutorial.js file into the App.js file.
//App.js file

import React from "react";
import "./App.css";
import Tutorial from "./Tutorial";

const App = ()=> {
  return (
    <div>
      <Tutorial />
    </div>
  );
}
export default App;
With that, we've successfully added font awesome 6 icons to our React app project, and we should have something like this.
Conclusion
This article explained the font Awesome icon and how to use the latest version which is version 6 with React application.


